Two flights and about eight hours of work later, I had accomplished something slightly ridiculous: turning two 24GB Nvidia GeForce RTX 4090s into two 48GB RTX 4090s. That is 96GB of VRAM across the pair, without replacing the GPU cores.
Why go to all that trouble? Because I want a personal computer that stays personal.
More and more, the monitor on your desk feels like a window into somebody else’s machine. Your files live on their servers. Your software needs permission to run. Your AI tools come with subscriptions, token charges, and questions about what happens to the data you feed them.
I’ve been collecting hardware for a family machine that amounts to “we have cloud at home.” Local AI is a big part of that plan. Unfortunately, the companies building the actual cloud are also buying mountains of hardware, which makes getting enough GPU memory an expensive proposition.
So I got scrappy. I found great deals on a pair of RTX 4090s and headed to Michigan, where Greg at GPU Lab would handle the terrifying parts. I would provide an extra set of hands, a healthy amount of anxiety, and occasional useful labor.
Key Takeaways
- The 48GB RTX 4090 conversion transplants the original core and memory onto a double-sided replacement PCB.
- Doubling VRAM increases memory capacity rather than doubling the card’s memory bandwidth.
- The conversion requires specialized rework equipment, repeated inspection, memory testing, cleaning, and extended drying.
- Both modified cards passed testing, providing 96GB of VRAM across the pair for planned local AI workloads.
Table of Contents
- How Do You Give an RTX 4090 48GB of VRAM?
- First, Dry the Boards and Install the Backside Memory
- Removing the GPU Cores and Original Memory
- Cleaning and Reballing Every Reused Chip
- Putting 48GB and a GPU Core Back Together
- Smaller Coolers, Same 450-Watt Problem
- It Boots. Now Does the Memory Work?
- The Final Step: Wash the Cards and Wait 12 Hours
- What This Upgrade Actually Accomplished
- Sponsor: RingConn
How Do You Give an RTX 4090 48GB of VRAM?
This is not a case of finding an empty memory slot and snapping something into place. We were transplanting the GPU cores and original memory from my cards onto replacement circuit boards sourced from China, then adding another set of memory chips.
My donors were a Founders Edition card and a Gigabyte card, the latter supplied by Wade, better known as DankPods. Both needed to surrender their most important components.
The replacement PCB uses a double-sided memory arrangement similar in concept to the RTX 3090. Memory packages sit on both the front and back of the board. Corresponding packages share channel connections, and the GPU selects which package it addresses.
The useful distinction is more capacity, not twice the memory bandwidth. Each finished card gets 24GB on one side and 24GB on the other. The memory interface has not magically become twice as wide.
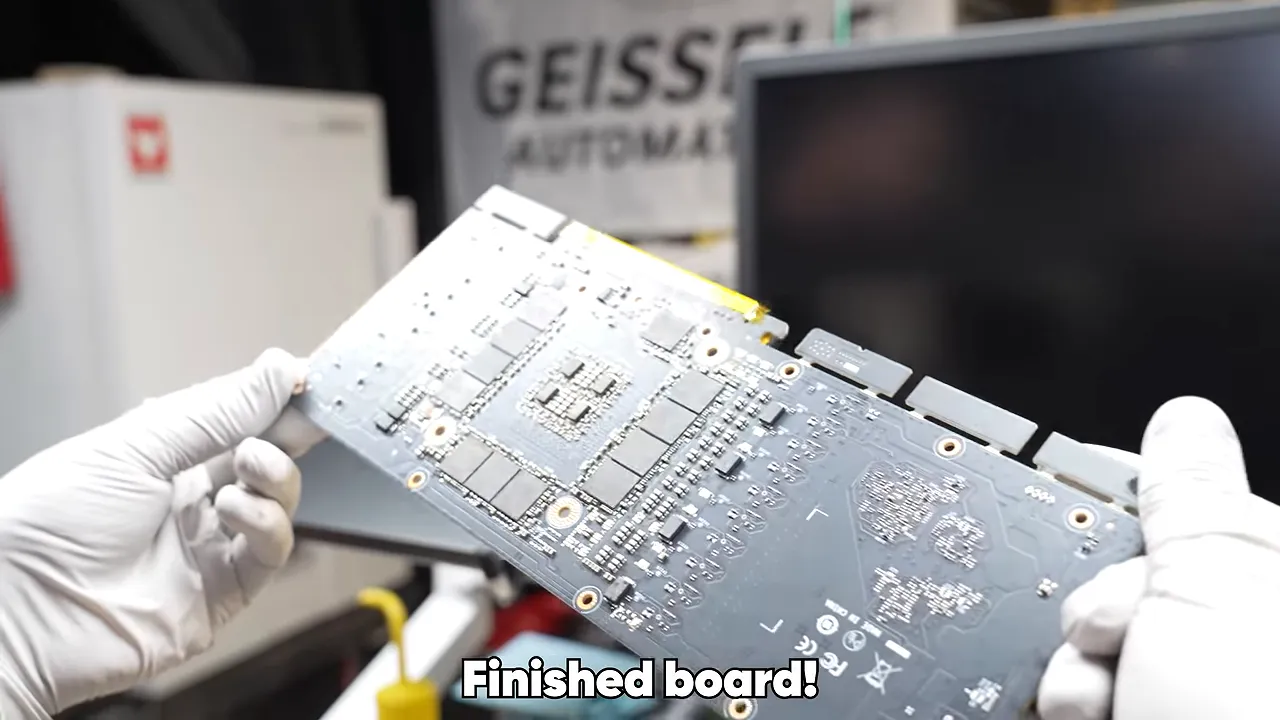
For my local AI plans, capacity is the point. More VRAM makes room for larger models, pushing this pair toward workloads that would otherwise require very expensive professional hardware. The 96GB figure is the total across two cards, though, not a single 96GB allocation on one GPU.
Getting the parts is its own job
Greg upgrades customer-supplied cards and also sells pre-upgraded ones when he can source donors. He would rather have customers send in their own hardware, because buying and testing suitable cards is a substantial job before the upgrade even begins.
Buying a dozen desirable GPUs at once can also push prices up. His approach has been to acquire cards gradually rather than clear out the available stock in one big purchase.
Memory availability adds another complication. Greg explained that the supply of the Micron modules he had been using had dried up, followed by escalating prices for remaining new old stock. His alternative was tested memory recovered from boards with failed GPU cores. Those chips are checked using a dedicated memory-testing fixture before being reused.
Sometimes replacement boards arrive with memory already installed. For mine, we started without it so I could get involved in the entire process. Lucky me.
First, Dry the Boards and Install the Backside Memory
The cards had arrived ahead of me and spent the night drying in Greg’s oven. Removing moisture prepares the boards for the heat involved in rework.
My first contribution was discovering that something taken out of an oven might be hot. Strong start.
We began with the additional memory for the backs of the replacement boards. Before placing any chips, Greg checked the PCB pads under a microscope. The factory pads arrive pre-tinned, but their solder coating is not necessarily perfectly flat.
A small point or raised patch can stop a memory package from sitting level. Greg uses a soldering iron and solder wick to flatten the pads, then inspects them again. Sometimes it takes a second pass.
From there, the process was:
- Apply a thin, even layer of flux across the memory footprints.
- Inspect each memory package’s solder balls for missing balls, debris, or unwanted connections.
- Place the packages in the correct orientation under the microscope.
- Check alignment before moving the board to the rework station.
Flux was going to become a very familiar substance by the end of the day. It helps protect the solder from oxidation during heating and improves heat transfer at the working surfaces. Greg compared it to cooking oil, which was useful given how much of this project involved ovens.
A machine that solders 12 chips at once
The BGA rework station is where loosely placed components become electrically attached components. BGA stands for ball grid array: the connections are an array of tiny solder balls underneath the package rather than accessible pins around its edges.
Greg’s station has specialized nozzles that let him reflow all 12 memory packages on one side together. That means they follow the same heating profile, making the process more consistent and repeatable than heating every package individually.
A side-view microscope camera provides a close look at the solder beneath the chips. The image is not pretty, but it is good enough to reveal the crucial moment when the solder melts. After the profile finishes, the heater lifts and the board cools.
Then it was my turn to prepare the second board.
Spreading flux sounded easy. Placing chips sounded manageable. Doing either while learning to work through a microscope was another matter. You are trying to coordinate your hands with a magnified image while placing expensive little rectangles very precisely.
My first few placements needed adjustment. The later ones were much better. Greg said the slight misalignment was within what could pull into place during reflow, but he corrected it anyway. Avoiding a redo is worth a quick nudge when that redo could cost another 40 minutes.
Removing the GPU Cores and Original Memory
With the backside memory installed on the replacement boards, we moved to the donor cards. This was the part where two working RTX 4090s stopped being working RTX 4090s, at least temporarily.
Greg changed the rework station’s nozzles for core removal and heated the Gigabyte card. Through the camera, we could see the solder joints stretching as he gently moved the pickup mechanism.
Once the solder was liquid and the remaining surface tension released, the GPU package lifted away.
Seeing a GPU core leave its board is wild. You know intellectually that it was soldered on at some point. That does not make it feel normal.
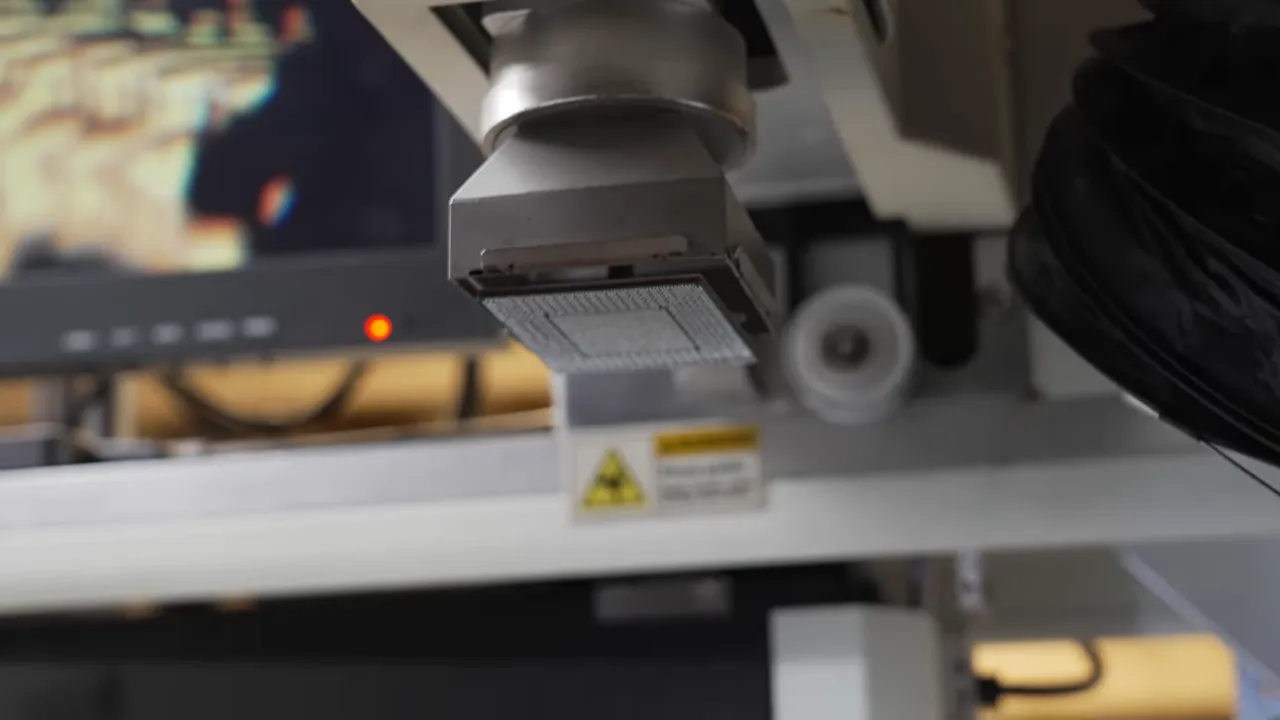
Next came the original memory. Greg attached a thermocouple to the donor board so the infrared preheater could regulate its output using the board’s temperature. The preheater warmed the PCB, while a separate tool applied localized heat to lift each memory package.
This is controlled heating, not simply pointing a hot-air tool at a cold board and hoping. The preheating and temperature monitoring are important parts of the process.
We repeated the extraction on the Founders Edition card, taking care to limit unnecessary rework and heat exposure.
The emptied donor boards also made for an uncomfortable reminder: a GPU cooler can conceal a PCB with no GPU or memory left on it. Greg had seen stripped cards offered for sale. Do not buy expensive used graphics cards without meaningful buyer protection. A convincing exterior is not proof of what is underneath.
Cleaning and Reballing Every Reused Chip
Removing a package does not leave it ready to attach somewhere else. Its underside carries old solder, and that solder needs to be replaced with a clean, consistent array of balls.
This is reballing, and it accounts for a lot of the careful bench work.
From messy solder to flat pads
Greg laid out the 12 memory chips from a donor and applied plenty of flux. He first passed the iron over the pads to collect excess solder and leave the surfaces properly tinned. Going straight to solder wick would saturate it unnecessarily.
Then came the wick, taking the remaining bumps down until the pads were flat.
There are effectively three states here:
- Freshly removed: uneven leftover solder across the package.
- Partially cleaned: smaller, more regular bumps remain.
- Ready for reballing: flat pads that can accept new solder spheres.
I helped clean the memory packages, and this was considerably harder than placing them. Keeping the iron at the right angle, moving smoothly, and retaining a useful view through the microscope felt like three different skills competing for the same brain cell.
Greg also reminded me not to linger on one chip with the iron. This is not a process where more heat and more time automatically produce a better result.
After inspection, we cleaned away the water-soluble flux with distilled water, followed by isopropyl alcohol, and arranged the packages in fixtures. The two GPU cores received the same basic solder-removal preparation.
Stencils put the new solder balls where they belong
A thin stencil aligns over the prepared package. Its holes correspond to the pads underneath, allowing correctly sized solder spheres to settle into the right locations.
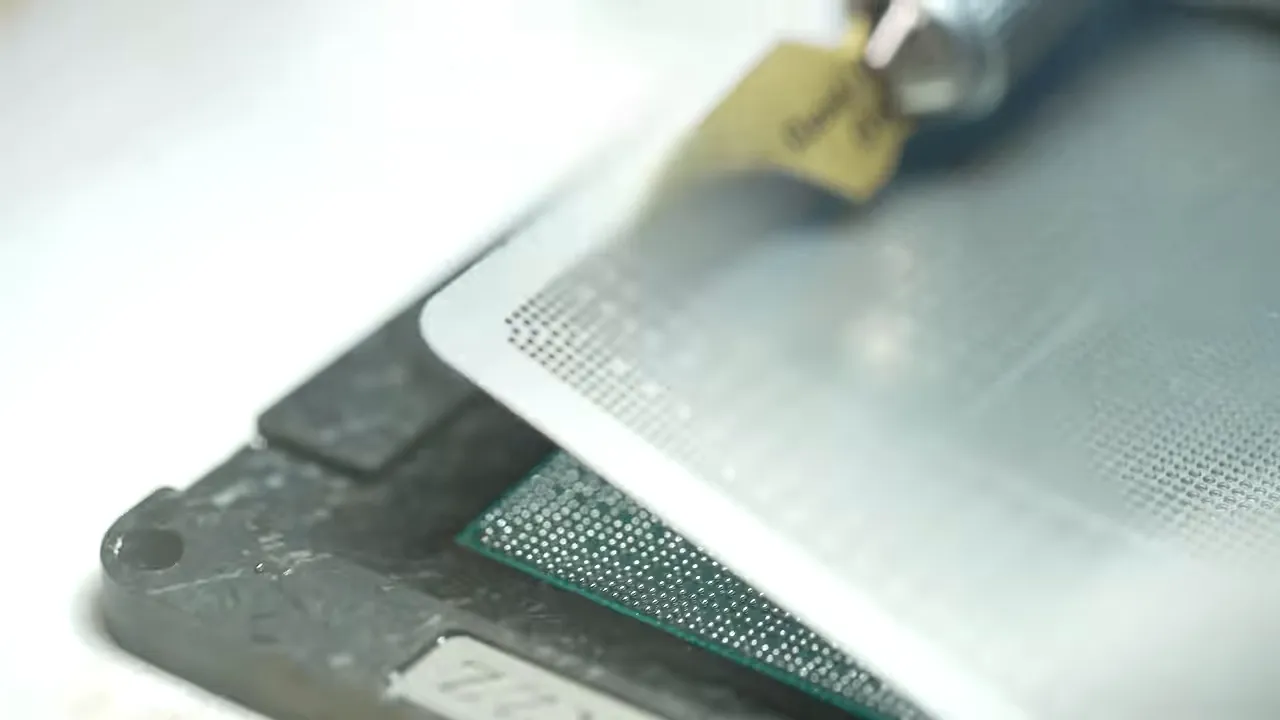
That sounds wonderfully efficient until you remember that every connection matters. Greg performed several inspections for missing balls, extras, and bridges. Any holes that remained empty could be filled manually under the microscope.
The packages then went into an infrared oven. Its programmed profile raises the temperature, allows heat to soak through, reaches reflow, and then cools the package in a controlled way. Because the oven does not blow hot air across the parts, it avoids that source of disturbance to the tiny spheres.
The memory packages and GPU cores use different sphere sizes, so the stencil and solder need to match the part.
A few spheres merged or slumped during our session. Greg removed the affected solder and corrected those spots while the parts were still warm. It was a useful illustration of why inspection is a repeated step, not a formality you perform once at the end.
Yes, those chips are going into water
Once reballed, the chips went into little individual baskets in an ultrasonic cleaner filled with distilled water. The baskets keep the components contained while the cleaner removes flux residue.
Then they went back into the drying oven.
The sequence matters: this is an unpowered, controlled cleaning process followed by drying. It is not an endorsement of giving your assembled, running PC a bath.
Putting 48GB and a GPU Core Back Together
With the recovered memory clean, reballed, and dry, we returned to the replacement PCBs. The additional backside memory was already in place. Now we needed to populate the front.
I applied flux and placed the original memory packages, matching the small corner dot on each chip to the orientation marking on the board. After another alignment check, each board returned to the BGA station for reflow and cooling.
At that point, one board had 24GB of memory on the front and 24GB on the back. Suddenly, the whole thing felt a lot more real.
Installing the GPU core required more help from the machine.
- A vacuum pickup nozzle lifted the GPU package.
- Laser alignment provided an approximate starting position.
- A prism camera overlaid the solder-ball array and PCB pads.
- Fine adjustment knobs corrected horizontal and vertical alignment.
- A rotational, or theta, adjustment aligned the outer edges as well as the center.
- After applying flux, Greg lowered the package and ran the core’s reflow profile.
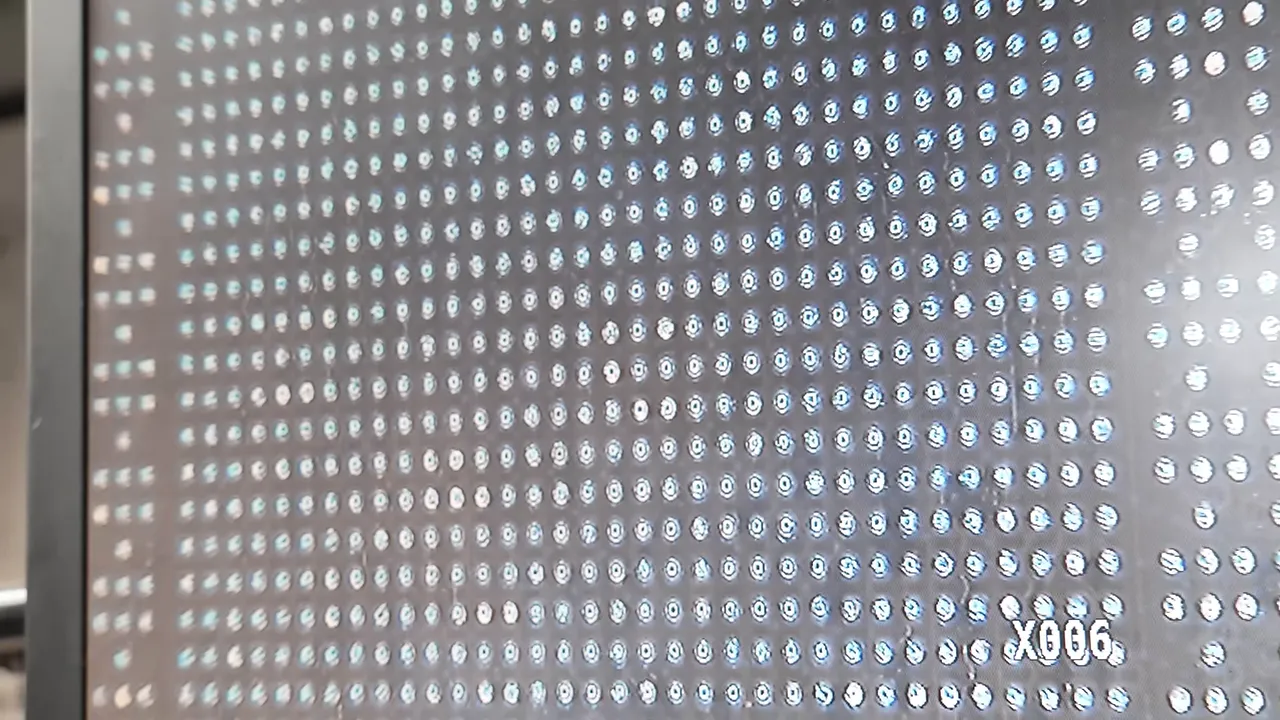
Checking the edges is important. An array can look centered while still being slightly rotated, leaving the outer connections misaligned. Greg checked both, then rechecked the center after adjusting rotation.
Once the core was attached, the result looked almost disappointingly ordinary. After all that work, it resembled a graphics card with its cooler removed.
Which, technically, it was. Just one with twice as much memory.
Smaller Coolers, Same 450-Watt Problem
Before cooler installation, we snapped off the remaining PCB tabs. Apparently this was supposed to be satisfying. Bending pieces away from a board containing my freshly transplanted RTX 4090 core felt more like a test of emotional resilience.
The replacement coolers are much smaller than the original consumer coolers. They are designed for density, not for making a gaming tower pleasantly quiet.
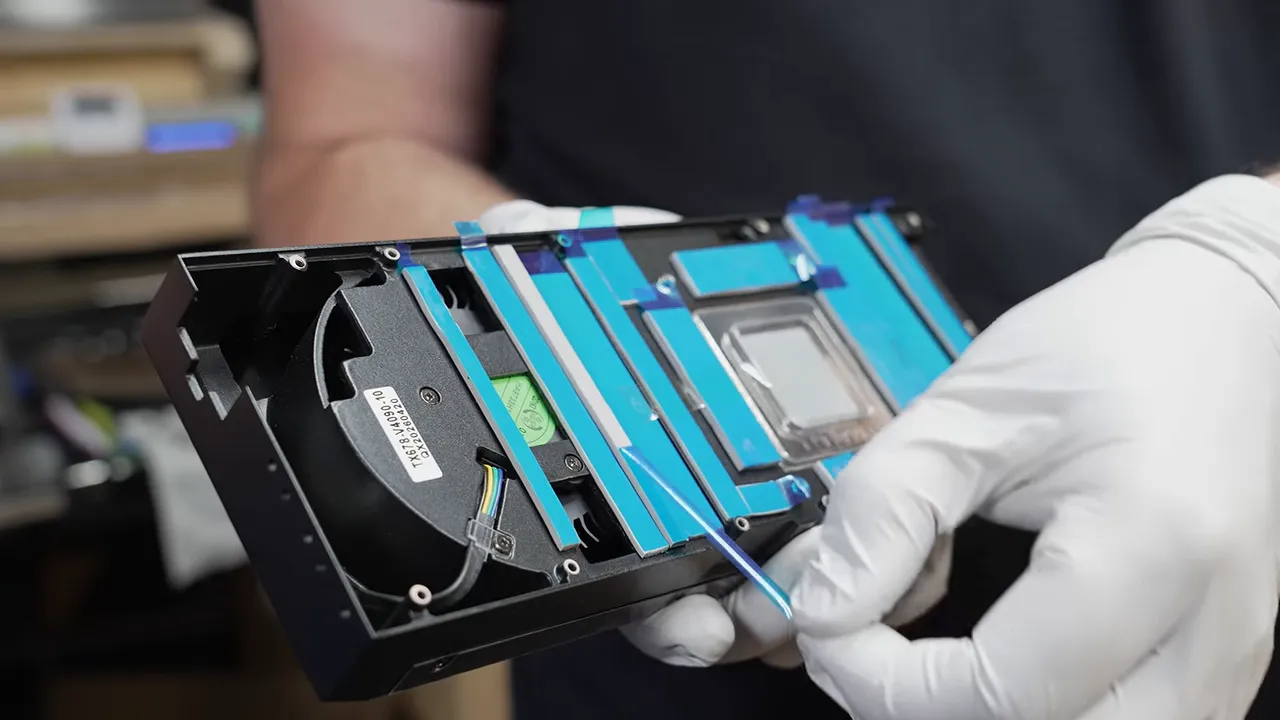
These cards can still draw 450 watts in this configuration. Getting that heat out of a compact heatsink requires serious airflow, supplied by a Delta fan running at roughly 5,000 RPM.
In other words, loud.
Greg also offers water blocks, which make sense if the cards need to coexist with human ears. A dense machine in a separate equipment space has different priorities from a desktop beside you.
We removed the protective films from the thermal pads, connected the fan, secured the cooler, and moved to the test bench.
It Boots. Now Does the Memory Work?
The first test was wonderfully simple: wait for the motherboard’s VGA status light to clear and hope an image appeared.
It did. The machine posted and reached Windows.
That was an excellent moment, but a successful boot is only the beginning. Greg ran Vulkan Memory Test, a free GPU memory-testing utility, while checking temperatures and looking for errors. The initial run lasted about five minutes and was one of the tests in his validation process.
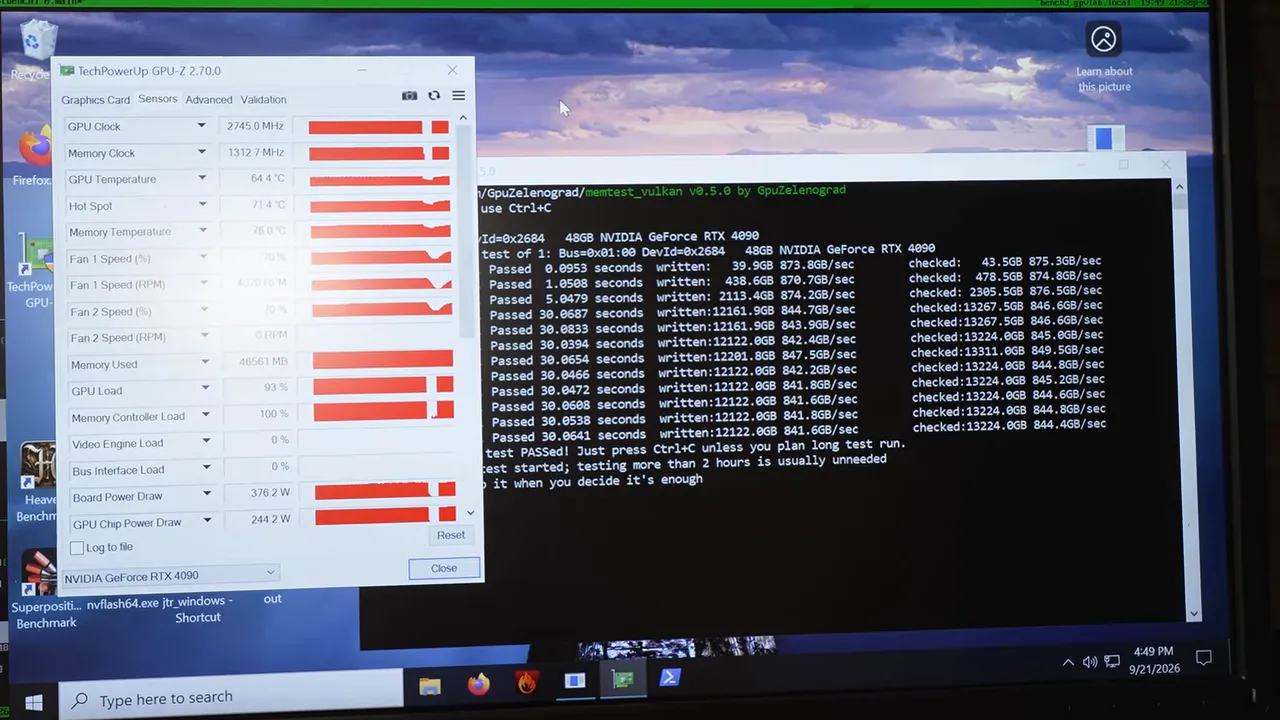
One number needed context: the test showed memory throughput around 850GB/s, compared with a theoretical rating of approximately 1,005GB/s for the memory configuration.
Greg explained that results vary with operating system and test conditions. He sees higher figures on Linux, with Windows somewhat lower, and roughly 850 to 900GB/s under this stress load. He considered the result normal and comparable to an unmodified RTX 4090.
Doubling VRAM did not mean doubling bandwidth, but this test did not show a bandwidth penalty from the modification either.
The second card passed as well. Two functioning 48GB RTX 4090s. I was extremely happy to have reached the part where we could stop taking them apart.
Naturally, we immediately took the cooler off again.
The Final Step: Wash the Cards and Wait 12 Hours
Testing was followed by a final cleaning. After removing the cooler and thermal paste, we lowered the board into the cleaning bath.
That felt wrong in a very specific, expensive way.
The remaining flux visibly clouded the water as it came away from the board. We also directed water underneath the BGA packages to flush residue out of areas that are difficult to reach.
After about 11 minutes of cleaning, Greg used air to remove surface water. Then each board went into the drying oven for approximately 12 hours.
That meant I would not be taking the cards home in my luggage. Greg would complete the drying process and ship them afterward. The hands-on work was finished, but the moisture-removal step was not negotiable.
What This Upgrade Actually Accomplished
The result was exactly what I came for: two RTX 4090s upgraded from 24GB to 48GB each, giving my planned local AI machine 96GB of VRAM across the pair.
This was a hardware conversion and validation project, not a local AI performance benchmark. We proved that both modified cards worked and passed the checks performed during the session. The larger-model experiments come afterward.
It is also very clearly not a casual soldering project. Greg used specialized fixtures, microscopes, optical alignment, controlled reflow equipment, repeated inspections, ultrasonic cleaning, and long drying cycles. I helped with some of the approachable tasks under supervision. He supplied the expertise that kept this from becoming an unusually expensive tray of spare parts.
For normal customers, the process is shipping cards to the shop, not flying to Michigan to become an honorary employee. At the time of our visit, Greg was also upgrading RTX 4080 Super cards from 16GB to 32GB and performing A100 conversions. Work on 178X modifications was still in development, with the 48GB upgrades taking priority.
That wider world of hardware modification is what makes this so cool. Between memory upgrades and projects repurposing hardware like the BC-250 and 178X, people are finding ways to get more useful life out of equipment that was never intended to work this way.
It is a fun, very expensive time to be into computer hardware. But there is something deeply satisfying about taking a machine you own and making it do more, especially when the goal is keeping more of your computing at home.
Sponsor: RingConn
RingConn sponsored this project. Its smart rings offer health information such as sleep and stress tracking without a wristband or a required subscription. The Gen 2 includes sleep-breathing insights, while RingConn promotes additional vascular-trend features on the Gen 3 and battery life of up to two weeks. The original promotion also included a limited Halloween discount for October 30 and 31, rather than an ongoing offer.


