Cloud AI is incredibly powerful. You can use it to write questionable documents, generate questionable pictures, and compose questionable music. What a time to be alive.
Jokes aside, it can also be legitimately useful for coding, data analysis, and asking questions that feel too dumb to bother a colleague with. Lately, I’ve been using it for smart home automation. Rather than reading a hundred pages of documentation, I can ask what a particular parameter does. Sometimes the answer is wrong, but even then, it often gives me enough clues to find the right one.
The problems are everything attached to that convenience: hallucinations, privacy concerns, controversial training practices, subscriptions, and usage costs. Running an LLM locally doesn’t fix all of that. But it does address some of it.
My goal is to handle more than 90% of my own AI needs on hardware I control, while keeping access to frontier models for tasks that genuinely benefit from them. That means building a machine that can work away on home automation and background jobs without a constantly increasing token bill.
All I need is the hardware. How much are RTX 5090s these days?
Oh. This is going to hurt.
Table of Contents
- Key Takeaways
- Why I Want AI on My Own Network
- A Ridiculous Case for a Ridiculous Workstation
- The Platform: PCIe Lanes Matter More Than CPU Bragging Rights
- Two RTX 5090s, With Some Extremely Questionable History
- Assembling the Machine: Functional, Not Fashionable
- The 3,000-Watt Power Supply That Went Back in Its Box
- The Software Stack: LM Studio Runs the Model, Hermes Gives It Tools
- Local AI Works Better When You Give It a Head Start
- The Real Goal Is Home Assistant Integration
- Less Cloud Dependency, Not Zero Compromises
- Sponsor: Squarespace
Key Takeaways
- Local inference reduces cloud dependency and per-token charges, but hardware and electricity still cost money.
- Model capacity, context requirements, and concurrent workloads matter alongside GPU compute performance.
- LM Studio hosts the model, while Hermes adds tools and messaging integrations.
- Scheduled background tasks can make local AI useful even when responses are slow.
Why I Want AI on My Own Network
The biggest attraction of local AI isn’t simply avoiding another subscription. It’s being able to integrate ongoing AI processing into other systems without wondering what an unattended task might cost by morning.
- Local processing: Prompts and model inference can stay inside my network.
- No per-token inference bill: The machine can keep working without a cloud provider charging for every iteration.
- Offline availability: Locally hosted models and local integrations can continue operating when the internet goes down.
- Control: I choose the models, software, and systems they connect to.
That is not the same as free computing. I still have to buy the hardware and pay for electricity. Nor does hosting a model myself magically make it accurate or resolve questions about its training data.
There’s also an important distinction between local inference and an entirely local workflow. A web search still needs the internet. Discord is still an external service. The model can run in my house without every tool attached to it being private or available offline.
But for a machine that could eventually become part of my home’s infrastructure, having that local foundation matters.
A Ridiculous Case for a Ridiculous Workstation
I already had the AI station mostly working on a test bench. Unfortunately, it had also permanently borrowed my portable water-cooling unit, which I normally use to troubleshoot rack-mounted systems. That was getting inconvenient.
Then SilverStone offered an excellent excuse to rebuild everything: the ALTA T1, a spiritual successor to my all-time favorite case, the Temjin TJ07.
Was the original my favorite because it had the best cooling? No. Because it was the easiest to build in? Also no. It just looked absolutely sick.
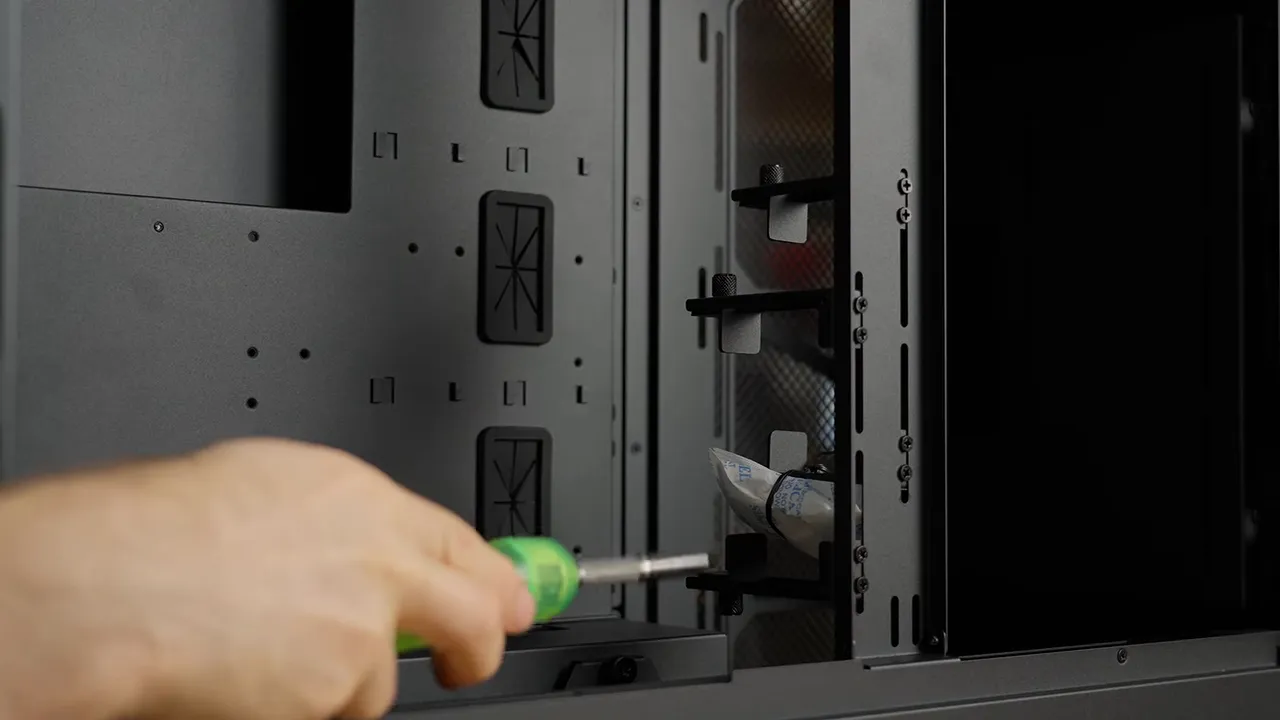
The new one follows through beautifully. A continuous piece of aluminum wraps around the chassis, with a separate flat rear plate. It’s enormous, it has wheels, and the interior has enough space to make two RTX 5090s look like a fairly restrained configuration.
More importantly, it has useful features for a multi-GPU workstation:
- A substantial GPU support system designed to accommodate multiple cards.
- Radiator mounting positions at the front, top, and bottom.
- Support for multiple power supplies.
- Plenty of room for a pump, reservoir, tubing, and expansion.
Gaming largely moved away from multi-GPU towers, but AI workstations give this category a reason to exist again. You can actually use all that expansion space.
The Platform: PCIe Lanes Matter More Than CPU Bragging Rights
The rest of this build was selected using a highly scientific process: finding excellent hardware that the Labs team wasn’t currently using.
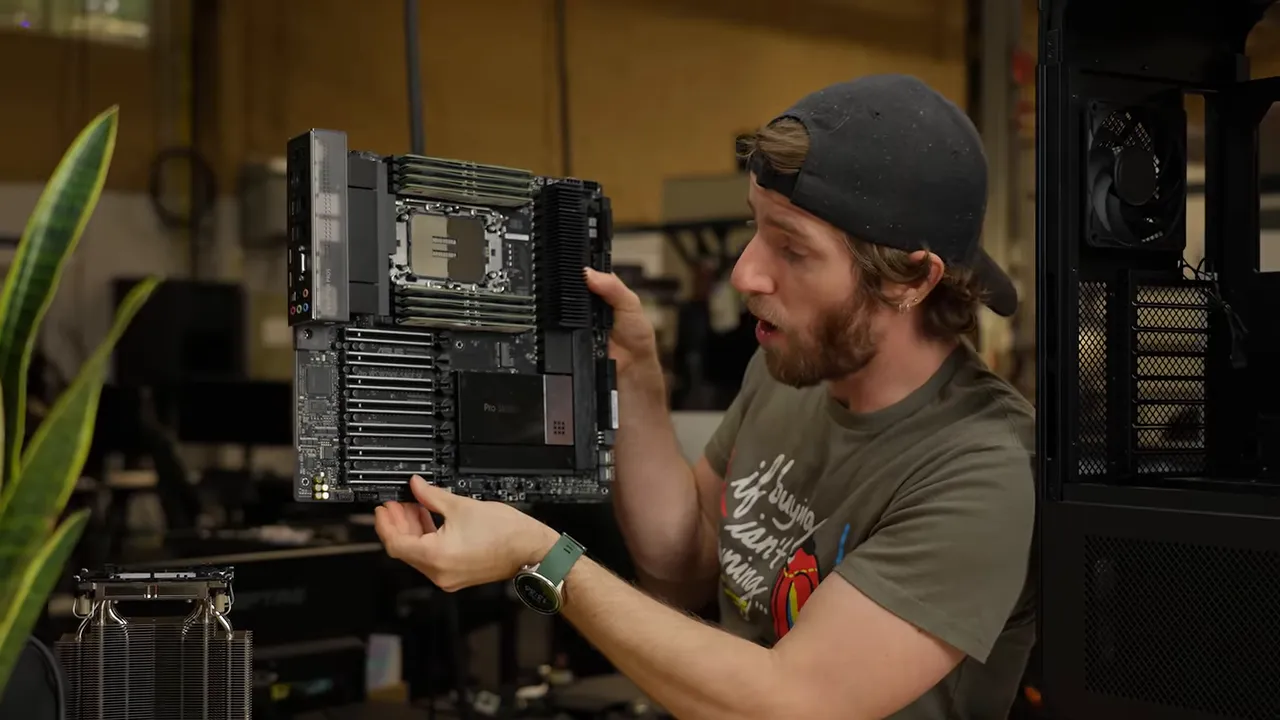
That left me with an Intel Sapphire Rapids workstation built around a Xeon w9-3495X. It has 56 cores and can turbo up to 4.8 GHz, which is nice. But neither number is the main reason it makes sense here.
The useful parts are its support for large amounts of system memory and 112 PCIe Gen 5 lanes.
On the ASUS Pro WS W790E-SAGE SE motherboard, those long expansion slots aren’t just decorative. The platform has the lane budget to run almost all of them at full x16 width. I don’t have enough GPUs to fill it today, but having room to grow certainly doesn’t hurt.
System RAM and GPU Memory Do Different Jobs
This platform uses registered DIMMs, or RDIMMs, which were painfully expensive when I put the machine together. Fortunately, I found a suitable kit among our less frequently used hardware.
I don’t strictly need enormous amounts of system RAM just to run an LLM on the GPUs. But I do want to run a bunch of containers alongside it, and memory headroom is useful for that.
System RAM is not interchangeable with VRAM. In this build, the GPUs hold the model and its working context, while system memory supports the host and the other services I want to run. Buying lots of one doesn’t remove the need to plan for the other.
Two RTX 5090s, With Some Extremely Questionable History
The GPU selection followed a similar philosophy: find the fastest cards that would be missed the least.
One RTX 5090 came from our Murderbox PC and already had a water block. The second was our experimental card with an XT120 power connector replacing NVIDIA’s much-discussed 12V-2x6 connector.
That modification had involved some fairly rough soldering and wiring. I tidied it up at home, and it had been working, but “working so far” is not the same thing as a validated long-term design. This is experimental hardware, not a connector conversion I’m recommending as part of a normal workstation build.
The Fastest GPU Isn’t Automatically the Best Local AI Purchase
The RTX 5090 is very fast and supports modern quantization formats. Quantization reduces the precision used to represent model data, helping make models more manageable in memory.
But compute speed is only part of the problem. Memory capacity and bandwidth can determine which workloads are practical in the first place. A fast GPU isn’t especially helpful if the model you want won’t fit.
Longer term, I might replace one of these cards with one or more memory-unlocked mining GPUs. One fast card could handle more responsive work, while cards with larger memory capacities could run background agents or additional models where speed matters less.
We already have an experimental mining card that started with 8 GB of VRAM and now exposes 64 GB, and it has continued working. That’s an interesting option for this kind of workload, even if it isn’t a conventional shopping recommendation.
A DGX Spark Detour, Naturally Involving Cookie Cutters
The Labs team’s DGX Spark setup illustrates why capacity matters. They were running a huge DeepSeek model, described as requiring roughly 410 GB for its parameters before allowing additional room for context.
Being able to accommodate something that large opens up possibilities that raw processor speed alone cannot.
And what were we doing with that capability? Making cookie cutters. Obviously.
The actual lesson is to choose hardware around the models and jobs you intend to run. “Buy the fastest gaming GPU” is not a complete local AI strategy.
Assembling the Machine: Functional, Not Fashionable
The CPU Attaches to the Cooler First
I hadn’t installed an LGA4677 processor before, and the mounting process feels deeply wrong if you’re used to desktop sockets.
Instead of seating the CPU in the motherboard first, the processor clips into the cooler’s mounting assembly. Then the combined assembly goes onto the socket.
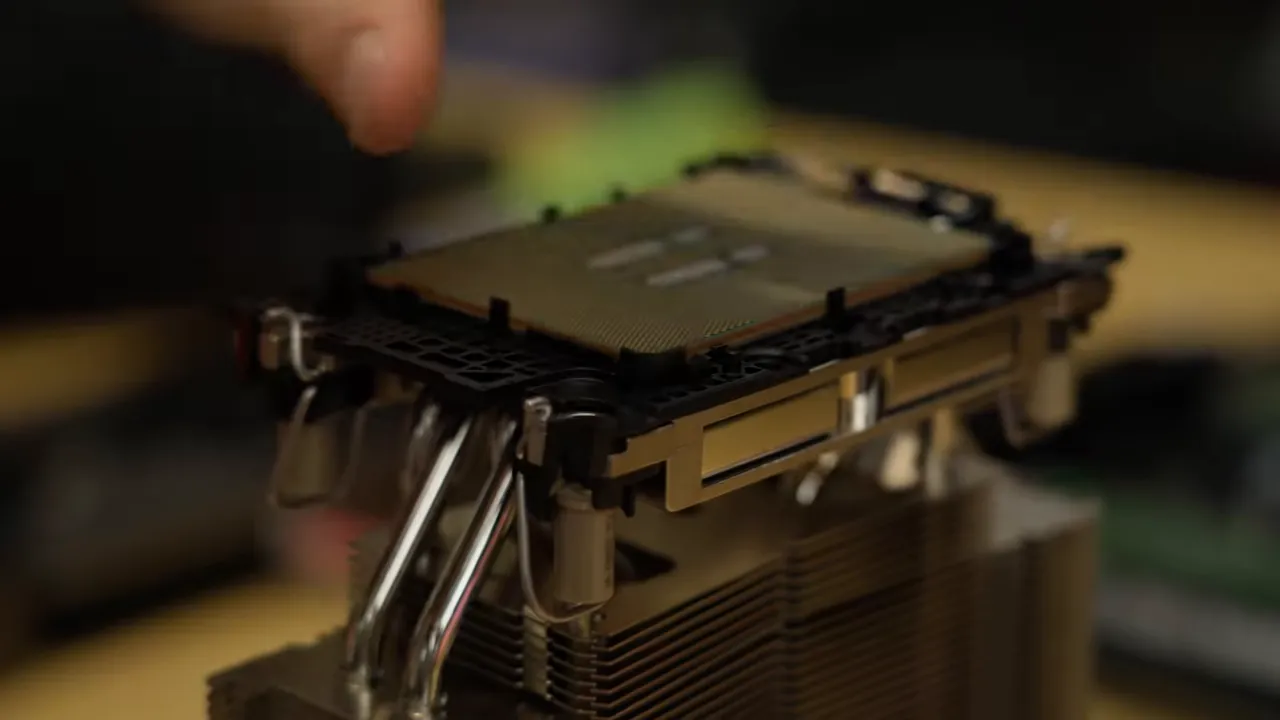
For this installation, the specified tightening torque was 8 inch-pounds, applied incrementally in a cross pattern. Don’t assume every workstation or server socket uses the same procedure. Follow the instructions for the actual socket and cooler you have.
The CPU stayed on a Noctua air cooler. Water-block options for this platform are limited, I’m not overclocking, and the air cooler can handle the job. The airflow plan includes exhaust out the top.
This is a functional machine. It does not need every component connected to a custom loop merely because I own tubing.
Even an Enormous Case Can Have Clearance Problems
The motherboard initially refused to sit properly on its standoffs. The culprit was the combination of its thick rear armor and the case’s thick cable-management grommets.
Fortunately, the grommets were thinner on one side. Reversing them provided enough clearance for the motherboard to seat.
It’s a good example of what happens near the edges of component standards. A huge case and a high-end board can still interfere in one very specific place. If a motherboard won’t sit flat, find the obstruction rather than using the screws to force it down.
A Practical GPU Cooling Loop
For the water-cooled 5090, I tracked down an old EK CoolStream 420 mm radiator. The pump and reservoir mount to a front plate in the ALTA T1 that has holes spaced to accommodate a 120 mm mounting bracket.
It’s a convenient arrangement, although I’d like some vibration isolation. A plate clearly intended to hold pumps would benefit from damping rather than letting pump vibration pass directly into the chassis.
I used ZMT soft tubing because it has low evaporation through the tubing and suits a practical build. Hard tubing might look more elaborate, but this machine doesn’t need to win a beauty contest.
I also kept some ancient Bitspower True Silver fittings. Their silver plating was intended to take advantage of silver’s biocidal properties. They’re a reminder that quality water-cooling parts can remain useful for many years if you aren’t constantly chasing a new aesthetic.
That’s not a reason to ignore coolant or material compatibility. It is a reason not to assume every rebuild needs an entirely new set of fittings.
Storage, Headers, and One Trapped Fan Cable
Storage followed the same theme as the rest of the workstation: interesting hardware we already owned but weren’t using. In went an Intel Optane SSD.
The motherboard didn’t have much front-panel complexity, or even RGB support, so that part was straightforward. I still managed to install a GPU before finishing the connections beneath it and had to pull it back out.
Then we discovered a rear fan cable trapped at the motherboard’s rear I/O area. Who installed the motherboard? That would be me.
The fix ultimately involved replacing the fan rather than dismantling the entire build. The useful lesson is less dramatic: check cable routing before tightening down a large motherboard, then finish the obstructed headers before installing enormous graphics cards.
The 3,000-Watt Power Supply That Went Back in Its Box
SilverStone sent a HELA 3000Rz power supply rated for 3,000 watts, with 80 PLUS Platinum certification and a frankly silly 250-amp rating on its 12-volt rail.
Finally, a power supply exciting enough to make unboxing a power supply feel exciting.
There was just one problem. It requires 220 to 240-volt input.
I initially assumed it might behave like some other very high-capacity units and support 120-volt input at reduced output. The label and documentation did not support that assumption. Back in the box it went.
The important part isn’t the wattage printed on the front. Check the PSU’s input requirements against the electrical supply where the machine will actually run. Don’t plug it into an unsupported voltage and hope the design happens to tolerate it.
We substituted a SilverStone ZEUS 1650R Titanium unit with two 12V-2x6 connectors. Capacity was still something to be mindful of, so I left the bottom of the case free. If the workstation eventually needs a second PSU, the mounting space remains available.
Why the Motherboard Needs Supplemental Power
This motherboard has an impressive collection of power connectors: the main 24-pin connection, multiple CPU power inputs, and additional 8-pin and 6-pin PCIe power inputs.
The supplemental PCIe inputs matter when filling the board with cards. Each slot can supply up to 75 watts. Across seven slots, that’s a potential 525 watts through the motherboard alone, separate from the power going directly to the GPUs.
You don’t want to expect the main 24-pin connector to carry all of that. The board’s supplemental inputs exist for a reason.
We also paid attention to cable reach and connector strain. A power cable being just long enough is not an invitation to pull it tight against an expensive graphics card.
The modified GPU needed a custom adapter. Standard 12V-2x6 sense connections indicate the supported power level; the experimental conversion instead had sense wiring configured to permit a 600-watt allowance. That arrangement does not verify the safety of the replacement connector, wiring, or solder joints. Again, this is a description of our test hardware, not a wiring guide.
The Software Stack: LM Studio Runs the Model, Hermes Gives It Tools
With the loop filled and the hardware assembled, the machine still had an almost comical amount of room left inside. Two 5090s? No problem. There’s space for more bad financial decisions later.
The more important question was what to do with it.
I already had LM Studio running a local model across both GPUs. Its defaults worked surprisingly well, including getting the two cards involved without the trouble I’d had with a previous setup.
But hosting a language model is only one layer. To connect it to tools and useful workflows, we added Hermes Agent from its official website.
Use the official Hermes site for installation instructions. Don’t copy a convenient-looking installation command from an unrelated page and execute it without checking where it comes from.
What Each Part Does
- LM Studio: Loads and runs the language model, then makes it available for other software to access.
- Hermes: Wraps the model in an agent harness with instructions, tools, and integrations.
- A messaging integration: Provides a familiar place to interact with the agent, such as Discord or Telegram.
LM Studio and Hermes don’t necessarily have to run on the same machine. The model host can be available over the network, with the agent connecting to it from elsewhere. For this setup, we kept them together.
Budget VRAM for Context, Not Just the Model
We loaded a Qwen model and found that the default settings were a sensible starting point. At a context setting of roughly 108,000 tokens, LM Studio estimated memory use in the neighborhood of 25 to 29 GB.
That estimate could fit on one card, although the configuration automatically distributed work across both.
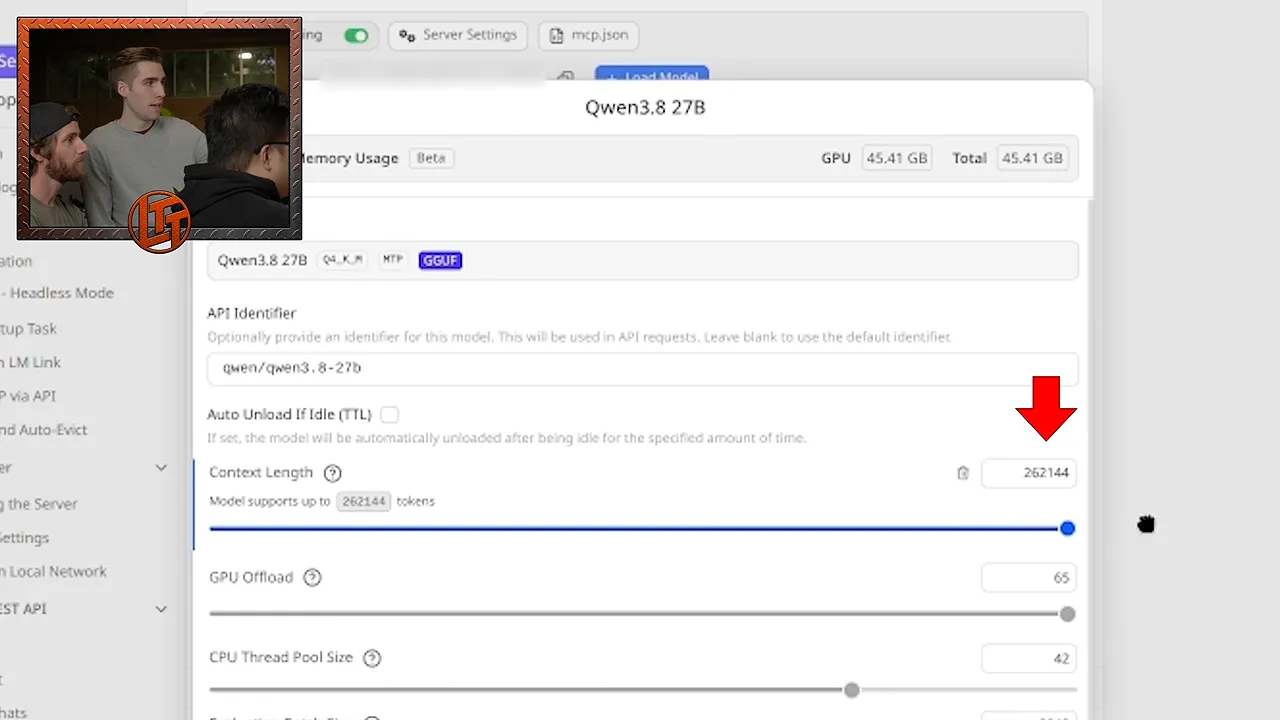
It’s tempting to turn the context slider all the way up because two GPUs are sitting there. But if I want multiple models loaded at once, each needs room for both its model data and its context.
Unused VRAM can be useful headroom. Allocating everything to one enormous context window may make the rest of the workstation less flexible.
Putting the Agent in Discord
One appealing part of Hermes is that the interface can be a chat application I already have on my phone. We started configuring Discord by creating an application for the bot, which eventually became Sventlana.
Not Jarvis. We have to draw the line somewhere.
The initial launch wasn’t completely smooth. We checked LM Studio to see whether the agent was actually generating work, then made a few adjustments to the environment configuration before the integration behaved as intended.
The detailed configuration belongs in the Labs companion setup guide. The central idea is simple: Hermes needs to reach the local model correctly, and its messaging integration needs the right configuration before the whole chain works.
Local AI Works Better When You Give It a Head Start
Even with two RTX 5090s, our first interaction involved a lot of waiting.
There’s a very specific early-internet feeling to submitting a request and wondering whether you have time to make a sandwich before anything happens. Expensive hardware does not guarantee instant responses from every model and agent workflow.
That doesn’t make the machine useless. It changes which jobs make sense.
An agent can implement something, test it, troubleshoot the result, and repeat. If that process can happen overnight, the fact that it isn’t conversationally fast matters much less.
The most useful local AI task may be one that finishes before you need the result.
A News Digest Was a Useful First Test
Once Sventlana was working, I asked it to find breaking technology stories for the WAN Show. It invoked web search and produced a digest.
The response leaned very heavily toward AI stories. So, yes, it worked, but the editorial judgment could use refinement.
More importantly, this is exactly the kind of job I’d rather schedule ahead of time. Instead of waiting for research while I’m trying to prepare, I could have a digest ready in the morning and spend my time checking and selecting stories.
That’s a better fit than expecting a local agent to deliver every answer immediately.
The Real Goal Is Home Assistant Integration
The workstation’s intended job goes beyond being another chatbot. I want to integrate it with Home Assistant and make it useful in my daily routine.
One example is recognizing particular objects as they approach the house, then sending an appropriate notification or warning.
Basic motion detection isn’t always enough. During heavy rain, I noticed my exterior lights had all turned on. A sensor reporting movement isn’t necessarily telling me that something meaningful is happening.
There are a couple of possible approaches:
- Use a straightforward rule: Incorporate weather conditions into the existing automation.
- Use richer analysis: Consider object recognition and other available data to distinguish useful events.
- Use AI to help improve the automation: Identify patterns and assist with setting up a lower-latency rule.
Not every decision needs an LLM in the live response path. Sometimes the useful role for AI is helping discover or configure the simpler automation that should handle the event.
We hadn’t completed those integrations yet. Away from my home network, even the existing Home Assistant connections weren’t available. The working model and messaging agent are the foundation, not proof that the house now has a fully functioning digital butler.
Less Cloud Dependency, Not Zero Compromises
This workstation is excessive. The component selection was driven by what we already had, and two RTX 5090s do not make it a budget alternative to a monthly subscription.
It also doesn’t eliminate hallucinations, make every task fast, or remove the need for frontier models. What it does provide is a platform I control: local inference, room for multiple services, and the ability to let background tasks run without a per-token meter ticking upward.
The next step isn’t buying more GPUs. It’s making the hardware useful through scheduled jobs, better prompts, and carefully chosen Home Assistant integrations.
Although, to be clear, I did leave space for more GPUs. Just in case.
Sponsor: Squarespace
Squarespace combines website building, online stores, payment processing, SEO tools, and site analytics in one platform. Its Design Intelligence tool helps create a starting template based on a few questions about your business and preferred style. We’ve also used Squarespace at LMG.


